
Mounting Blades to New Boots
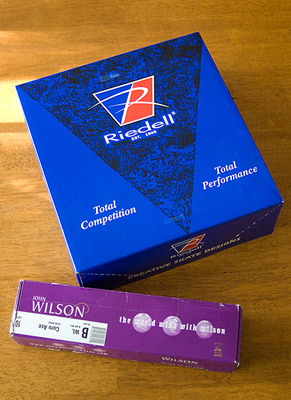
I purchased a new set of Riedell Gold Star boots in late 2007 to replace my worn-out 2002 Gold Stars. I also ordered a new set of Wilson Coronation Aces to go with the boots.
Mounting Steps: (click on any thumbnail to enlarge)
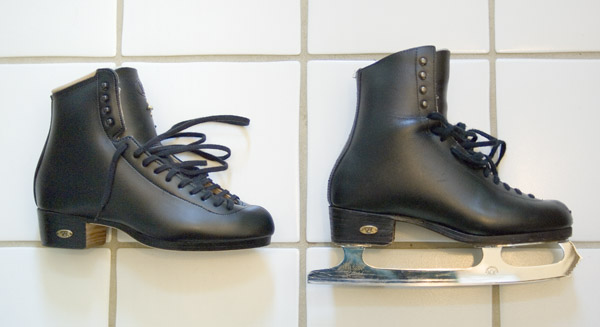 |
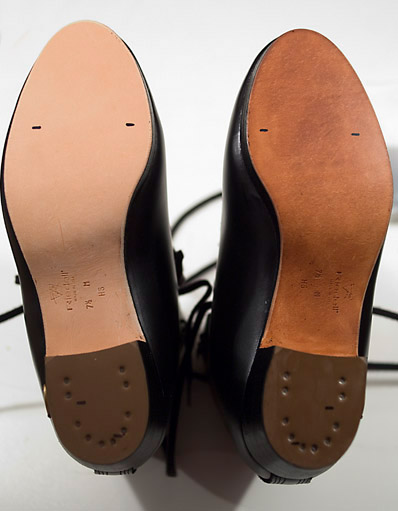
The new style Riedell Goldstars (#375) are substantially different from the 2002 model that I previously owned. They are shorter by about an inch, and considerably softer. |
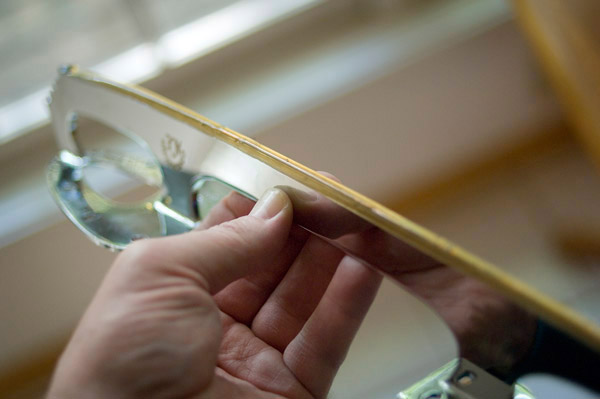 |
New blades sometimes come pre-sharpened with a protective strip of gelled-material covering the edges. The sharpening quality can vary. On these blades, one edge was decidedly sharper than the other. I sharpen my own blades, so I fixed the factory sharpening after the temporary blade mounting (shown later in the steps). |
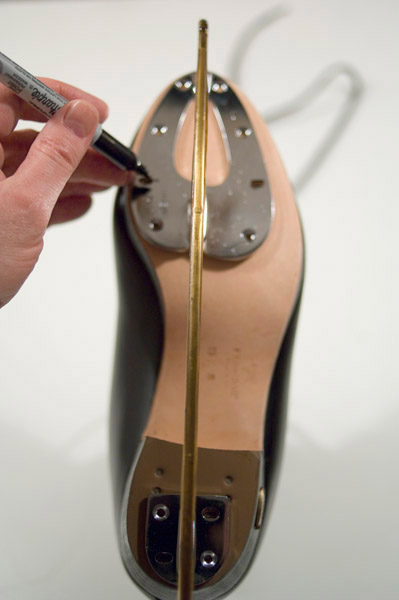 |
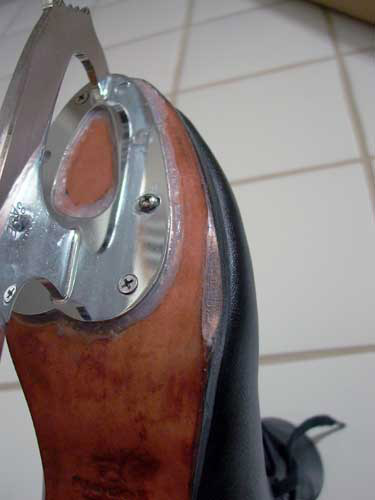
Position the front of the blade at the top-center
of the sole and the rear of the blade at the bottom-center. Don't judge
center by the seam - it may be displaced from the actual center of the
sole. Making sure the blade doesn't slip, mark the sole through the
slotted holes with a pen or pencil. I used a Sharpie. Don't mark the permanent holes yet. You need to skate a little to see if the blade needs adjusted left or right. |
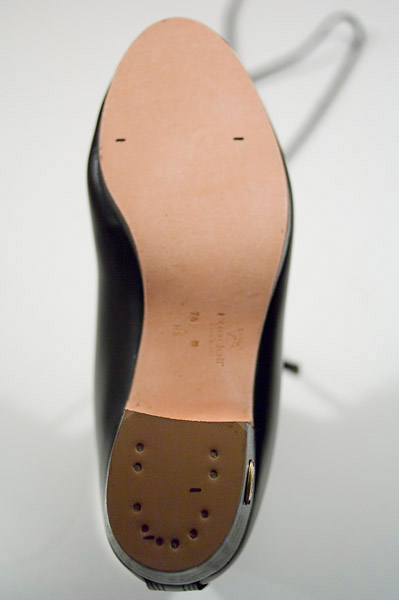 |
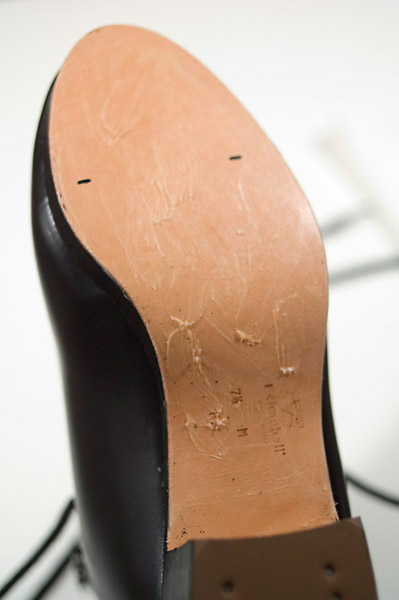
The indelible ink on the sole and heel identify the location of the slotted holes. |
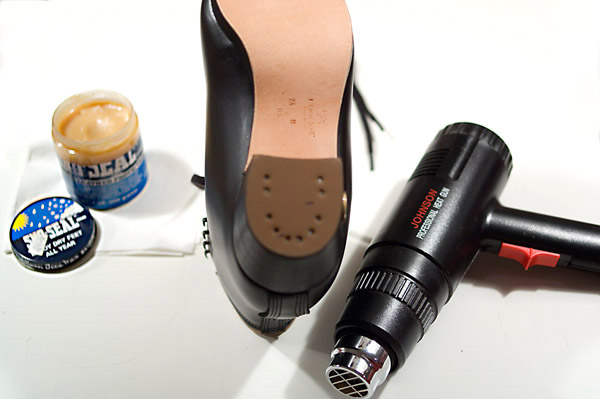 |
At this point, I waterproof the soles with Sno-Seal beeswax. It is applied by hand and melted/absorbed into the sole using heat. A hair dryer works OK, but I have a hotter heat gun that make short work of the melting task. My heat gun can get VERY hot, so I use it carefully. |
 |
Here is a photo of the Sno-Seal before being heated. Just rub it on and spread it around. The outer heel lamination on the Riedell #375 is rubber and won't absorb Sno-Seal. Don't bother coating rubber-surfaced heels. |
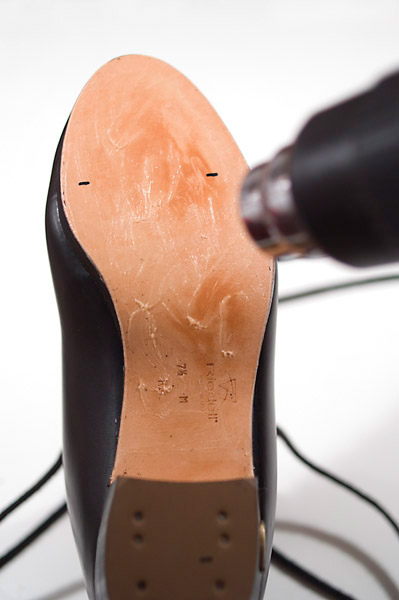 |
Using hot air from the heat gun, the Sno-Seal melts and is absorbed into the sole's leather. Keep applying more Sno-Seal until the sole stops absorbing it. |
 |
The difference between a treated sole and untreated sole is apparent. Sno-Seal darkens the leather a bit. |
 |
Use an awl to make a small hole where the screws
will go. NOTE: The blade itself doesn't have to be on the sole like this
picture shows if you've accurately
marked your slotted holes in the steps above. The awl tip should be pushed into the center of the mark so a drill bit will center on it and not wander. |
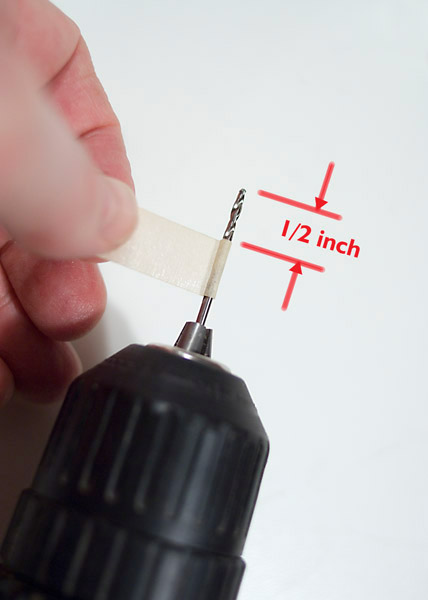 |
I used a 5/64" diameter drill for the sole, and a
3/32" diameter drill for the deeper heel holes. To prevent drilling
too deeply in the sole, I mark the 1/2" depth using a couple wraps
of masking tape. The tighter 5/64" hole works well with the short 1/2" long screws for the sole, but the heel screws are longer (3/4") and produce much more friction because of the deeper hole. That's why I use a slightly larger diameter drill on the heel even though all screws are #6. |
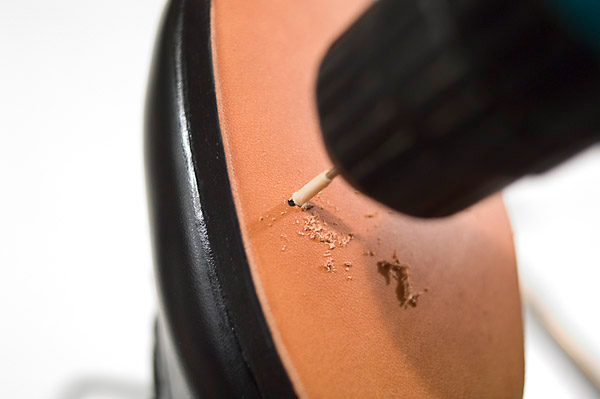 |
Align the drill bit with the small hole made by the awl. It should center on it. Be sure to hold the drill perpendicular to the surface of the sole, and drill until the masking tape touches the surface. This will provide the depth you need. |
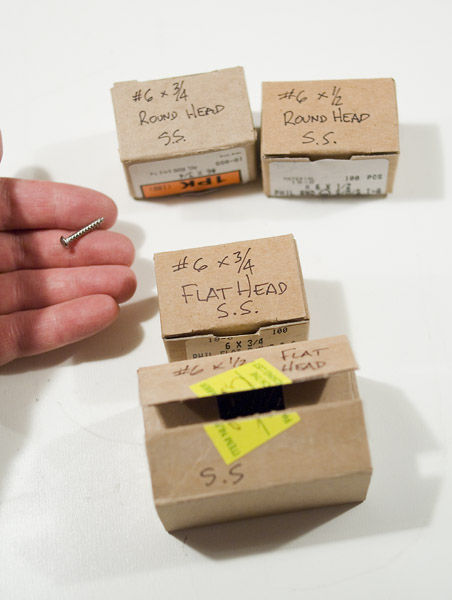 |
I buy 18-8 stainless steel
screws to resist rust. Most blade installs I've seen use galvanized
screws. Galvanizing provides substantial rust resistance, but the
protection afforded will diminish over time. I prefer stainless. You'll need four different screw types - #6 x 1/2" round head, #6 x 1/2" flat head, #6 x3/4" round head, and #6 x 3/4" flat head - all in Phillips head. I buy small boxes of the screws from McMaster-Carr in the US. They sell high-quality fasteners. |
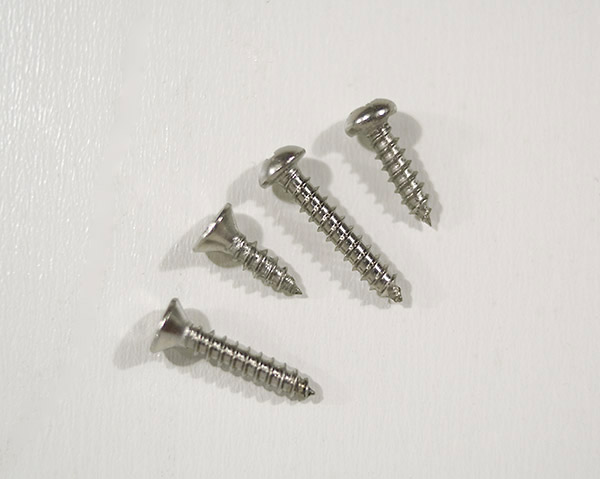 |
The screws have a sheet metal thread with a standard point. These screws cut their own threads as you tighten them. Don't confuse the threads used here with machine screws that require tapped holes. |
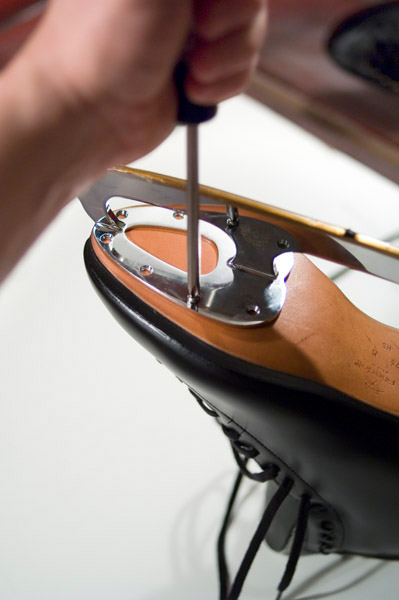 |
Some people dislike
Phillips head screws, but the source of their complaints is usually a
poor-quality or poor-fitting screwdriver. With quality tools, the
self-centering action of the Phillips is a big help, and with enough
downward pressure, the driver won't slip. I've found that Sears
Craftsman screwdrivers in the US are readily available and are high
quality. Using a power-screwdriver when fitting screws into soft leather could easily cause a stripped thread. Use less tightening force for soft material like leather than when putting screws into wood. A quality hand-held screwdriver is ideal. For the initial testing of blade position, put screws into only the slotted holes. For my Coronation Ace blades, there were two slotted holes on the front mount, and an additional two on the heel mount. I put round head #6 x 1/2" screws into the front slots, and longer #6 x 3/4" round head screws into the heel slots. |
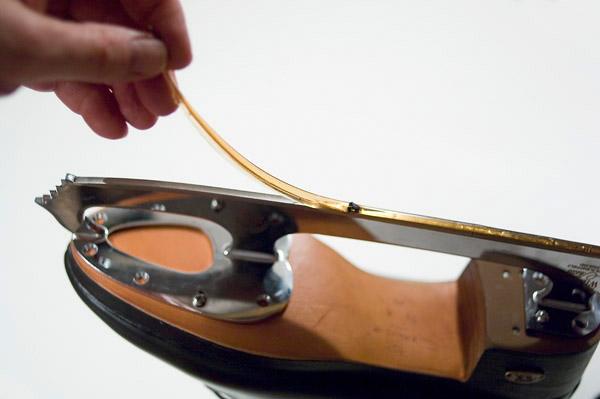 |
Now it's time to peel the protective strip from the blade edge. I leave it in place when putting in the temporary screws to prevent accidental contact of the blade's edge with a tool. |
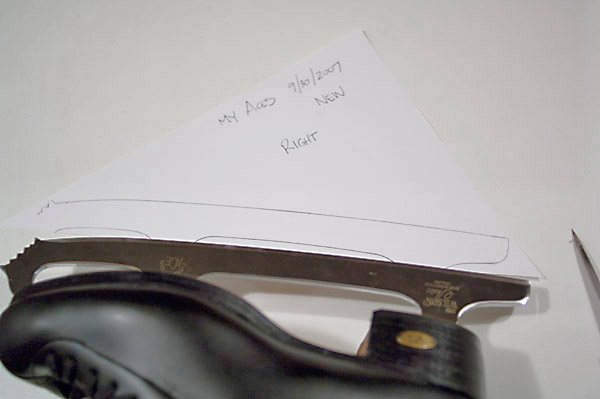 |
This step is optional, but
I trace the shape of the blade onto paper for comparison later. Machine
sharpening can change the shape of the rocker over time and a sharpening
mistake can alter or eliminate the rocker. A flattened rocker is the
most common power-sharpening mistake. Having a before-and-after tracing
can pinpoint why a blade performs poorly.
I sharpen my own skates using the hand-held Pro-Filer which removes metal very slowly. It's hard to accidentally change your rocker significantly when sharpening by hand. The tracing is my way of knowing how much of the blade has been ground away over time, and if the rocker has changed. After tracing the blade profile, I sharpened the blades before skating on them. The factory sharpening on these blades was marginal. One side was very sharp, the opposite side was somewhat dull, but that was taken care of before skating. |
Now go skate. Take a screwdriver. Adjust the blade to your preferences. Attempt NO vigorous jumps using just the temporary screws!
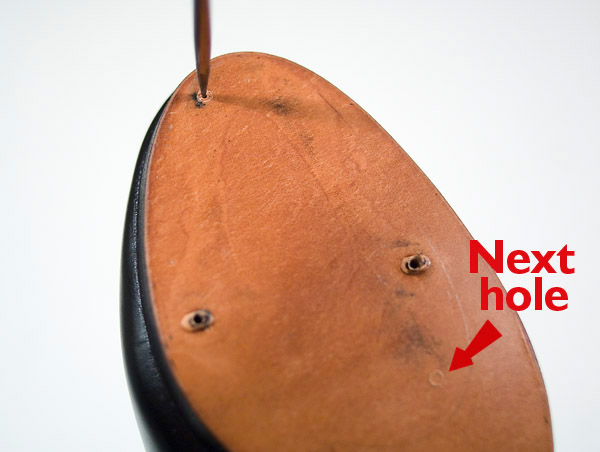 |
After the test skate
session or two and with the blade adjusted for your preferences, you are
ready to permanently attach the blade to the boot.
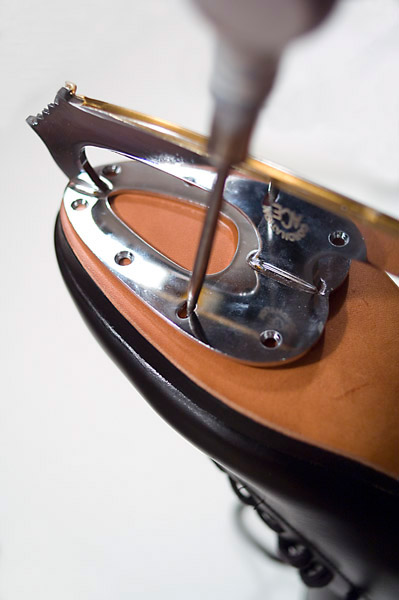
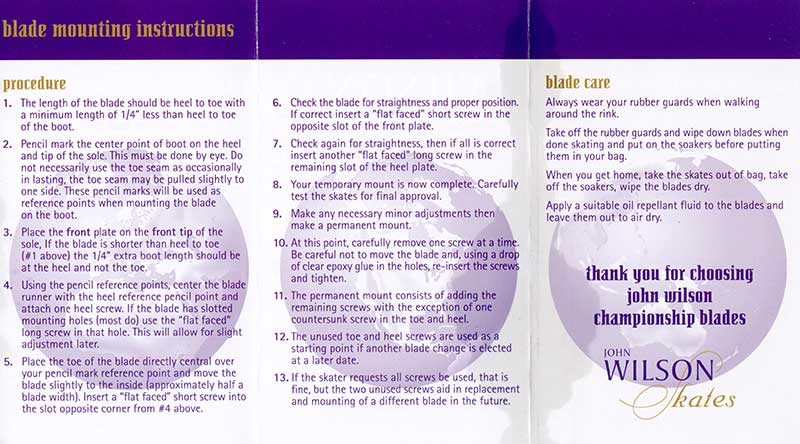
Without removing the blade from its preferred position, use an awl or a sharp pencil to mark two additional holes on the blade's front mount, and one additional hole on the heel mount. On the front mount, choose on from the front-most part of the mount, and one diagonally opposite on the rear of the mount. See the diagram for approximate locations (click the thumbnail to enlarge). Mark one additional permanent hole on the heel mount. Remove the skate blade after you mark the new screw locations, and use the awl to punch the exact center of the hole locations. Use a drill to make 1/2" deep holes with the 5/64" drill bit in the front soles, and drill a 3/4" deep hole with the 3/32" drill on each heel. |
 |
Here's another optional
step, and one I might revisit someday. Using room temperature
vulcanizing (RTV) silicone sealant on the mounting plates seals gaps and
prevents water from becoming trapped between the metal and leather.
Consider it to be a self-forming gasket. The disadvantage is that it is
messy looking. Still, this is on the underside of the boot so who cares?
My last pair of boots lasted over 5 years, and when I replaced them, the
sole and mounting system was still very sound. Update 2017: Ten years after these skates were prepared, I am still skating in them. The sole is still solid. This sealant method works well. There are a number of varieties of silicone sealant available, and most of them will work fine for this application. |
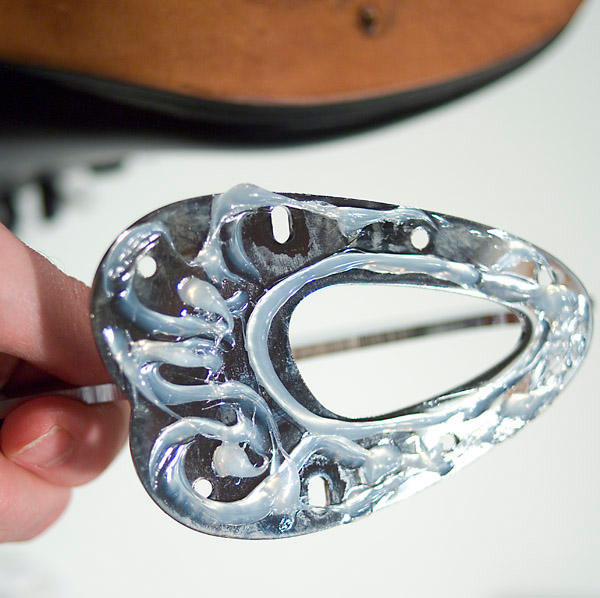 |
Here's an abundant application of silicone onto the sole plate. It's more than ideal, and I had substantial amounts of silicone squeezing out. It filled the gaps though! |
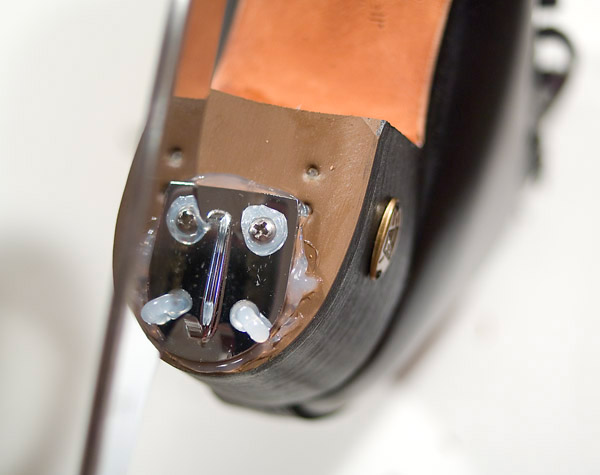 |
Here's a shot of the silicone squeezed out of the holes when the screws are tightened. Use you fingers to smooth the silicone sealant as much as possible, especially around edges where water has access. It won't look pretty when you're done, but it will be very effective from trapping water between metal plate and sole. |
Here's a picture of my previous set of skates with the silicone sealant neatly smoothed around the blade mount. This is how it could look if you use reasonable quantities of sealant.
Further notes:
1) Wilson recommends putting a drop of epoxy glue into the screw holes when permanently mounting new blades. This sounds like a good idea to further strengthen blade mounting, although I haven't done it myself with new boots. I don't know of any local boot fitters that do this either.
2) Some steps given above don't have to be in the order shown. For example, I had already marked temporary screw holes before applying Sno-Seal. One could apply Sno-Seal first, then mark the holes for the blade.
3) If the screws do strip out over time, I've found that the next larger screw size (#8) will most likely work fine in the existing holes. If those strip, then it's time to tackle the more involved job of plugging holes and starting fresh. I've never had to do that though.
4) I'd like to investigate the waterproofing capability of thinned polyurethane wood finish on the leather sole. I've read somewhere that it is sometimes used as a waterproofing material instead of Sno-Seal. It might provide durable protection. Minwax and other companies make polyurethane finishes for wood, and it's very tough and water resistant. If thinned enough with paint thinner to soak well into the leather, it would certainly waterproof it. It will harden the leather somewhat, but I don't know the extent of the potential brittleness. It sounds promising, and perhaps I'll investigate it someday.
5) Once mounted, trace your blade's edge onto a piece of paper. Over time, multiple sharpenings tend to flatten the rocker of a blade. If you have a tracing, you know how far a rocker has changed over time.
6) June 2019 - I came across a very well done web site about mounting blades, and they perform the service for elite skaters. The video on the page is a must see. The company is Precision Blade Honing Enterprises - http://precisionblade.com/index.php/precision-blade-mounting
Bill Schneider
October 7, 2007
edited January 28, 2014
edited June 4, 2017
edited June 15, 2019 to add note about Precision Blade Honing Enterprises