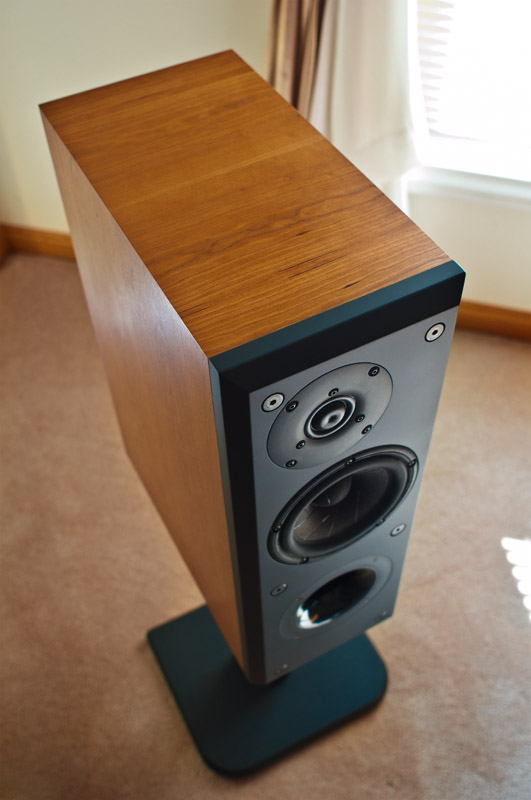
Madisound in late 2009. This example is finished in cherry veneer with
a removable baffle.
Madisound Recession Buster Reference TM two-way
Designed by Clearwave Loudspeaker Design (CLD)
|
|
|
| The Recession Buster Reference kit was a one-time
offering from Madisound in late 2009. This example is finished in cherry veneer with a removable baffle. |
Build Log
I completed this project with another project already underway (but unfinished) for two reasons. One, I have always been intrigued by expensive Scan-Speak Revelators. I was curious about what benefit was provided by the extra cost.
Two, Madisound had a sale on a kit that included 5-1/2" Scan-Speak Revelators combined with SB accoustics "dimple dome" tweeters. The kit was attractively priced probably because it used a shielded version of the Revelators that were being discontinued. The kit was designed by Jed Kunz of Clearwave Loudspeaker Design for specifically for Madisound.
Click any thumbnail picture to enlarge...
| Cutting Large Panels | |
 |
For the cabinet, I bought a 4x8 sheet of
3/4" MDF from Lowe's.
I had Lowe's cut down 4x8 sheets of MDF so they fit into my Toyota
Matrix. Lowe's will make two cuts on their panel saw for no cost.
Back home, these panels were further cut down outdoors using a circular saw and straightedge. After that, the pieces were brought indoors for trimming on the table saw. |
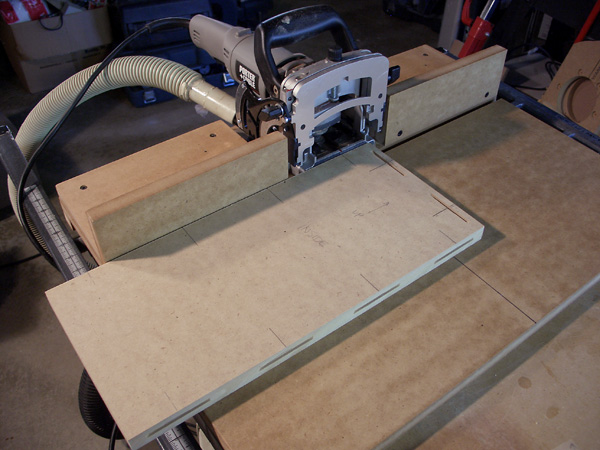
| Cutting Biscuit Slots | |
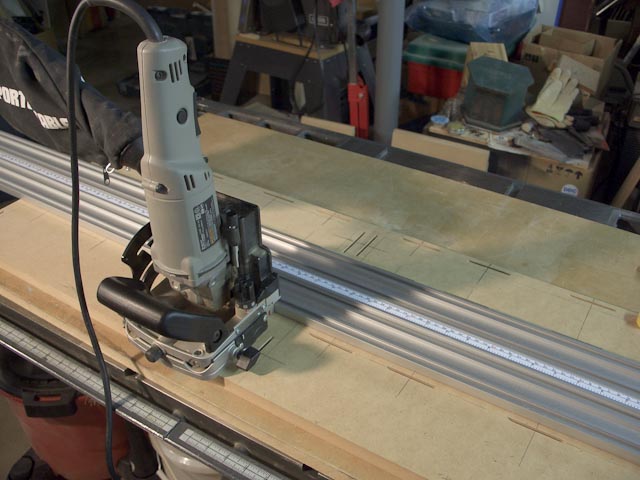 |
I used biscuits to align the glued-up edges of the cabinet and some of the bracing. The mating edges of the cabinet are easily cut with the help of a jig that aligns them. For the braces, a straightedge clamped across opposite sides of the vertical panels allowed me to cut slots for biscuits in proper alignment. These slots, cut into the face of the cabinet and the ends of the braces, properly aligned the cabinet bracing and shelving. They are "keyed" into place when gluing up, and don't slip out of position. This little extra work up-front made later work much easier and more accurate. |
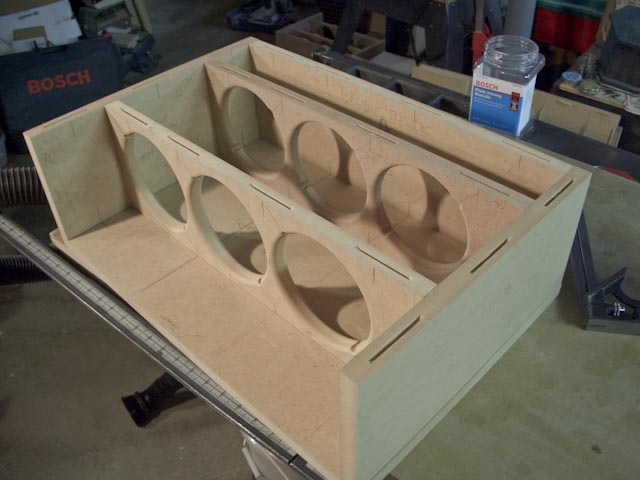
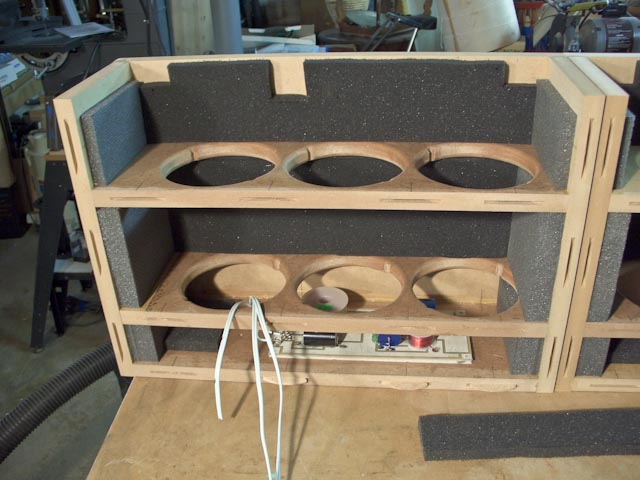
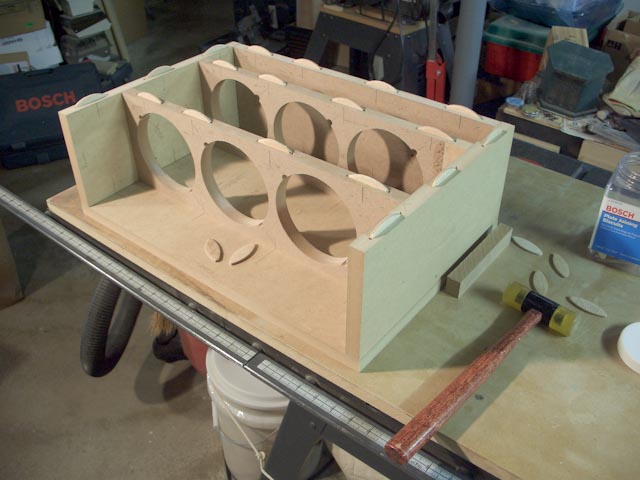
| Biscuits and Assembly | |
|
These photos shows how the braces and shelves are keyed into the biscuit slots. I can snap the pieces into position for a dry fit without glue. Further, I can glue the cabinet together in sections. The unattached side panel is used as a positioning template during glue-up to support the braces and shelves in alignment. When the glue was dry on the bottom part, the unglued panel was removed to provide access to the inside. |
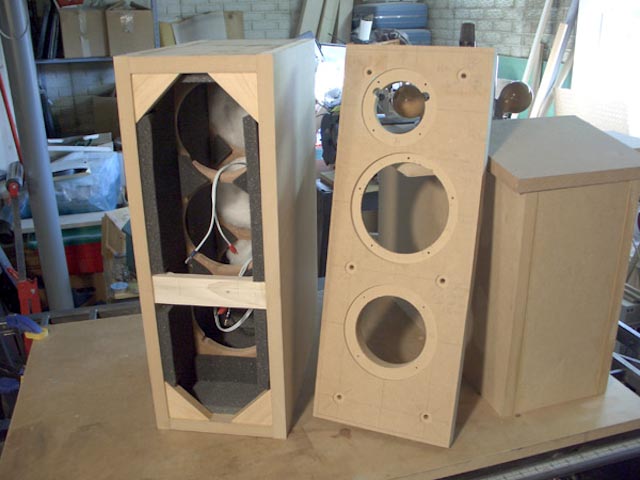
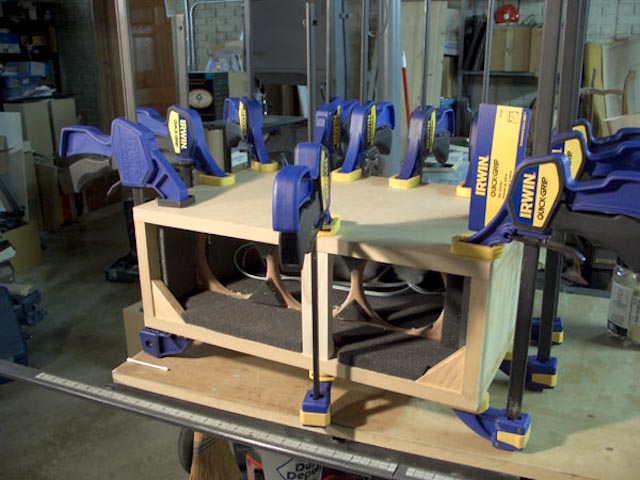
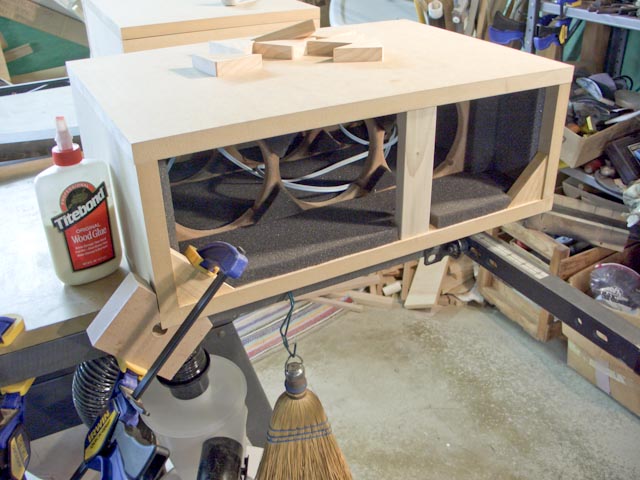
| After Partial Glue-up | |
|
I glued up four of the five sides for
the cabinet and the bracing, but left off one panel. In this picture,
the missing panel was keyed in place while the remaining pieces were
glued together, but I didn't glue it to the rest of the assembly at this
time. After the glue dried on the remaining sides, I removed the top.
This permits access to the inside for applying damping foam, attaching
the crossover to the back, and running wires. After the wiring and crossover mounting, then the missing piece was glued into place. The biscuits aligned nicely because they had been inserted (dry) when the majority of the cabinet pieces were glued together. A brace made of pine was also glued into position during the final glue-up. Once all sides were assembled, then I fabricated some corner gussets that would later hold hurricane nuts for fastening the baffle. They were glued into position using a simple jig. |
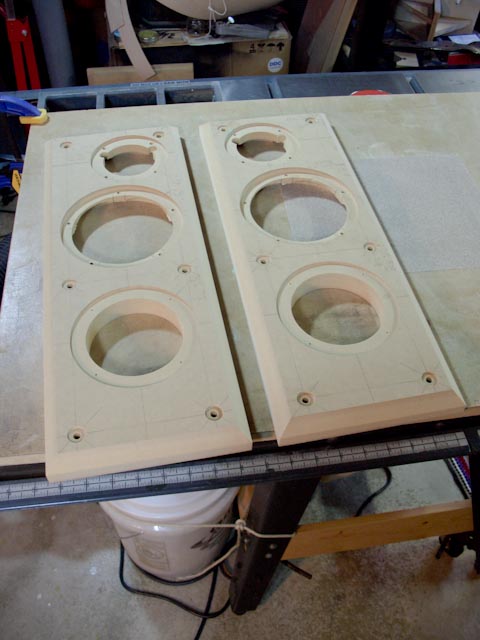
| Baffle Fabrication | |
|
Before cutting, I carefully draw a cut plan on each baffle
to reduce mistakes -
including the most common mistake, forgetting to mirror-image baffles
that have offset drivers. After drawing the cuts for
the baffle, I used a Jasper circle routing jig on my Bosch plunge router
to cut the recesses for the drivers and the through-holes on the front
surface. Like many of my medium-size builds, the baffle material for
this speaker was 1-1/8" thick MDF stair tread from
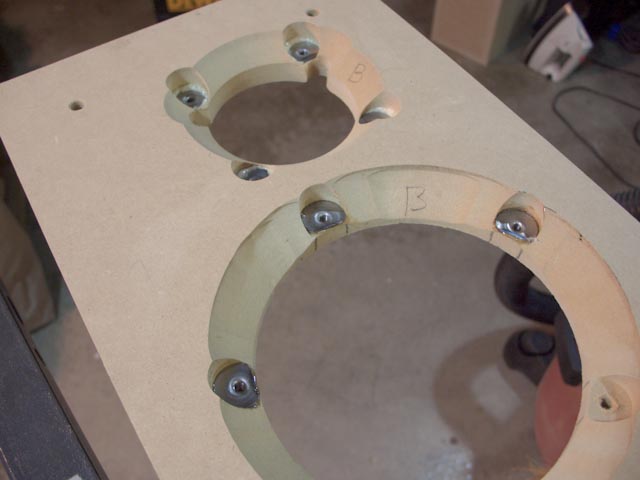
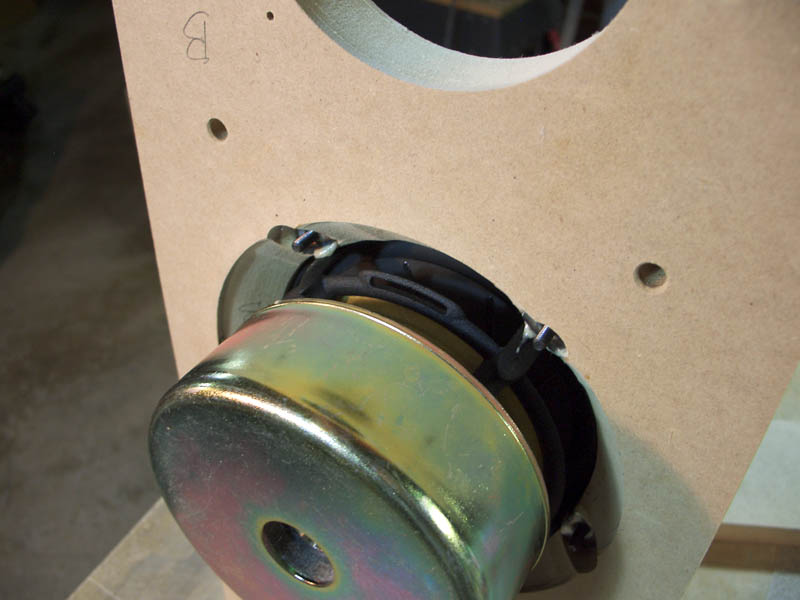
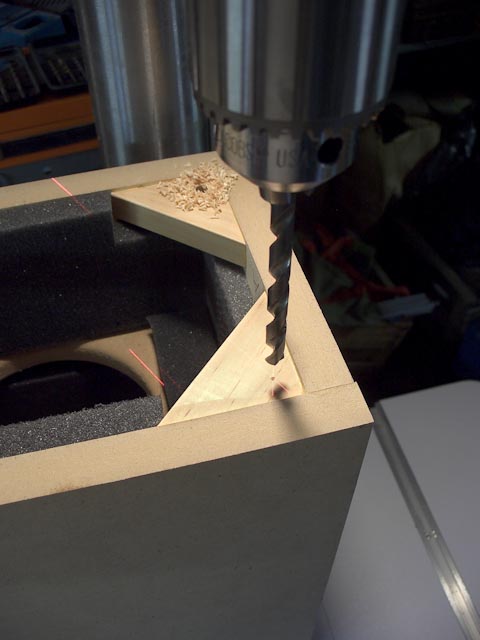
Lowe's. I used a 3/4" flat-bottom router bit to cut the recesses for the speaker mounting flanges, then cut the center away with a 1/4" spiral upcut bit. Once routed on the front, I turn my attention to the back. I begin by using a Forstner bit to drill the large-diameter recesses for the hurricane nuts, then route a 45-degree relief around the woofer opening. With thick baffle material, the relief chamfer is necessary to permit the air to move around the woofer's backside. See the last picture in this group to grasp the consequences if there had been no relief for the woofer. I also chamfered the tweeter opening here to. Although it's not necessary, it does provide a little more room for fingers to attach leads to the tweeter. When attaching the hurricane nuts, I rough up mating surfaces using a triangular file, and add a drop of Gorilla glue to firmly attach them to the MDF. This reduces the chances that any of them will loosen and spin when driving machine screws into them. Also note how I ground flats on the edges of the woofer hurricane nuts to clear the woofer frame. I just used a bench grinder, and it went quickly and easily. |
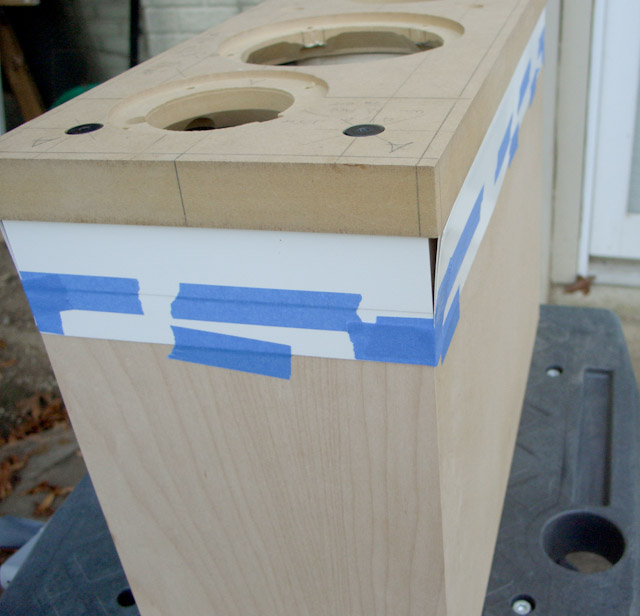
| Mating the Baffle to the Cabinet | |
|
The holes in the baffles were drawn to
scale earlier and drilled after the driver holes/recesses had been
machined. To precisely position the baffle on the cabinet, I relied on
the remaining centerlines that I had created on the baffle. On the
cabinets, centerlines were measured and drawn after glue-up, flush-trim,
and sanding. I aligned the centerlines, and used some tape to
temporarily lock the two mating pieces into position. Once they were aligned and not likely to shift, I used transfer punches (from Lee Valley) to mark the baffle hole positions onto the cabinet. Using the accurate marks provided by the transfer punches, I moved the cabinet to the drill press to drill holes for the hurricane nuts. |
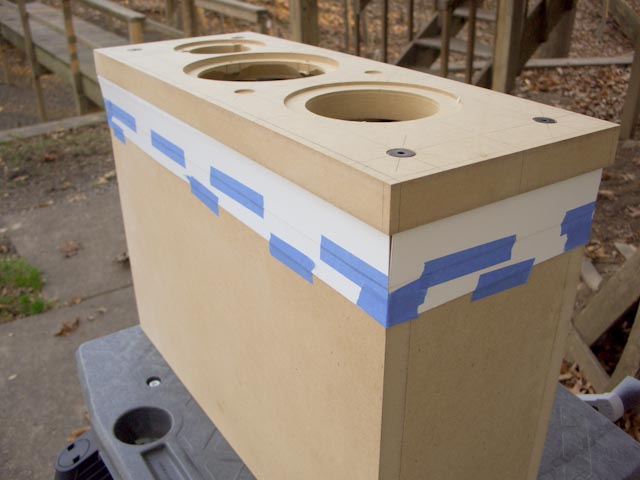
|
Once the hurricane nuts were affixed, I
attached leftover pieces of paper-backed veneer to the tops of the cabinet
where the sides and back meet the top. With changes in humidity, I've
seen MDF butt joints telegraph through the veneer, and this was an
experiment to use double-thick veneer on the top. I used some leftover
maple veneer on the top. It's what I had on hand. It would be veneered
over later, so the type of wood didn't matter. The whole cabinet would eventually be veneered in paperbacked cherry using the iron-on yellow glue method. If the baffle is trimmed without accounting for the veneer thickness, the veneered cabinet is slightly larger than the baffle. To account to the veneer thickness (~0.025"), I bought some poster board at the grocery store. It takes about two thicknesses of the poster board to equal the thickness of the veneer. I just used painter's tape to hold it in place when trimming the oversized baffle to fit the cabinet. I made sure the tape wasn't in the path of the flush trim bit's bearing. The size of the baffle after this is a little larger than the cabinet, but once the final veneer were glued on, it would match perfectly. After trimming the baffles to the desired size, I added a chamfer to the edges for appearance and to aid diffraction. |
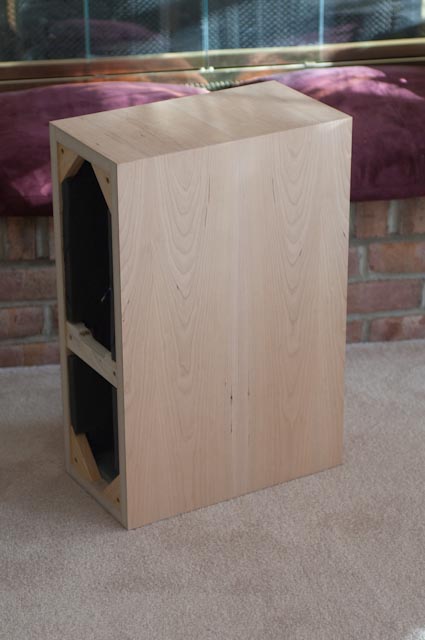
| First Sound | |
 |
While waiting for good painting weather,
I assembled the speakers for a first listen. While their appearance was
homely at this point, their sound was better than I expected. This is a
quality kit! I almost hated taking them apart again for paint and veneer. |
| Veneer | |

|
I purchased some cherry paper-backed
veneer from a Woodcraft store. I used the
iron-on yellow glue method to attach it to the cabinets. The top picture shows the existing maple veneer about to get a coat of glue. The cherry would be attached over the maple on the top to provide a double-thickness of veneer in an attempt to reduce the telegraphing of MDF butt joints over time. It does reduce, but does not completely eliminate telegraphing. The reduction is enough though that I will continue to use double-thicknesses on cabinet tops. It was very apparent that cherry darkens with exposure to light. What began as a medium pinkish brown color became very rich after a couple months exposure to light. This happens even after finish is applied. At this point, I assembled everything again for a test. The baffles still needed paint, and that requires warm weather because I paint in the garage. |
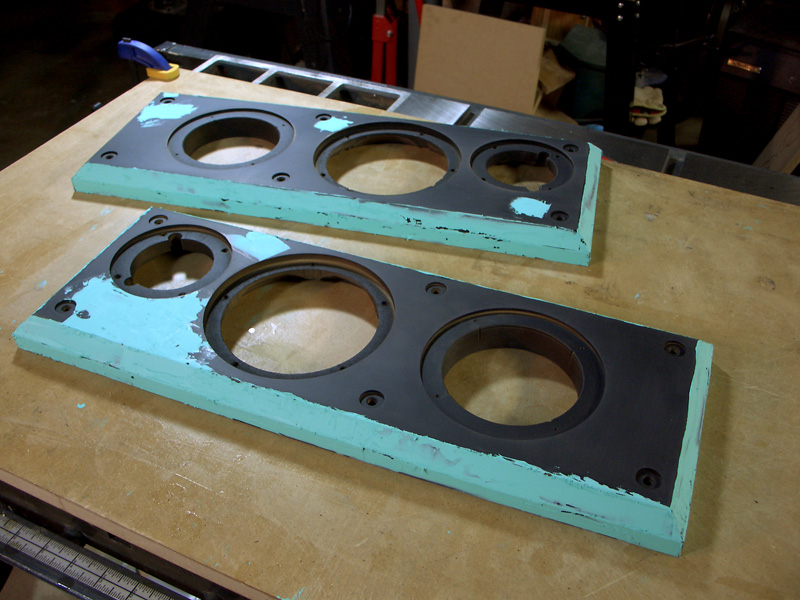
| Preparation for Painting the Baffle | |

|
I gave the baffles two coats of Zinsser Seal Coat sanding
sealer. It's dewaxed shellac. I sanded lightly between coats. Close inspection in glancing light usually reveals small imperfections in the surface of the MDF. I use 3M automotive spot putty (green paste in a squeeze tube) to fill the minor divots. It applies and dries very quickly, and sands easily. After filling and smoothing the imperfections, I usually apply one more coat of Seal Coat before priming. In the case of this baffle, I got so frustrated with small imperfections that I puttied the entire edges of the MDF before sanding and painting. It paid off. I used Rustoleum Sandable Automotive Primer because it builds quickly, giving me something to sand into. I use fine sanding sponges for the final smoothing before painting. Because it's an oil-based primer, I allowed it to dry for more than a week before painting over it with water-based finish. This part made me nervous, but after a couple years, there's no problem evident. I'm still on the lookout for a good, sandable water-based primer though.(Found! - see the LX521 construction notes, page 3, where I used General Finishes Enduro water-based primer). General Finishes Lamp Black paint, diluted 1 oz water to 16 oz. paint, provided the final finish for the baffles. I used a Lowe's small gravity feed spray gun to spray the paint. The finish can be described as semi-flat in appearance. |
| Finishing | |
|
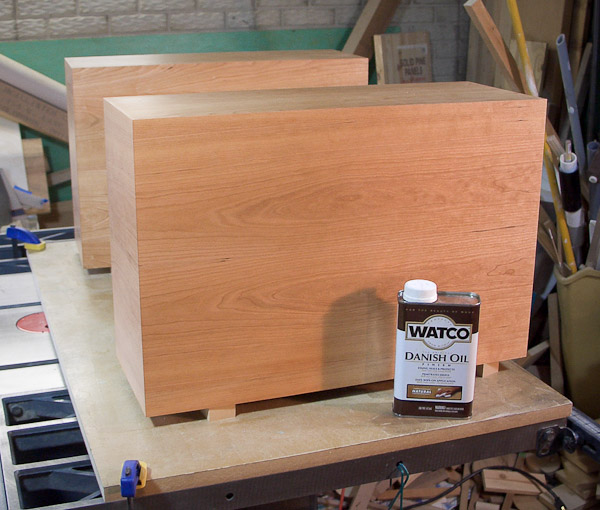
Over a period of a couple weeks, I applied several coats of Watco Danish Oil. Early on, I used some fine sandpaper to rub in the finishing oil. After an hour's wait, I would wipe off the excess with some cotton cloth. Subsequent coats were applied with pieces of an old cotton T-shirt, and the excess removed after an hour. Drying time between coats was generally several days. |
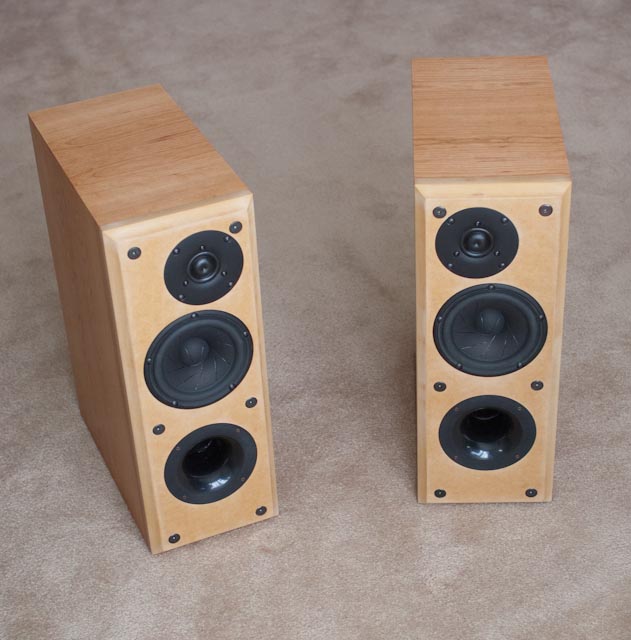
| Finished! | |
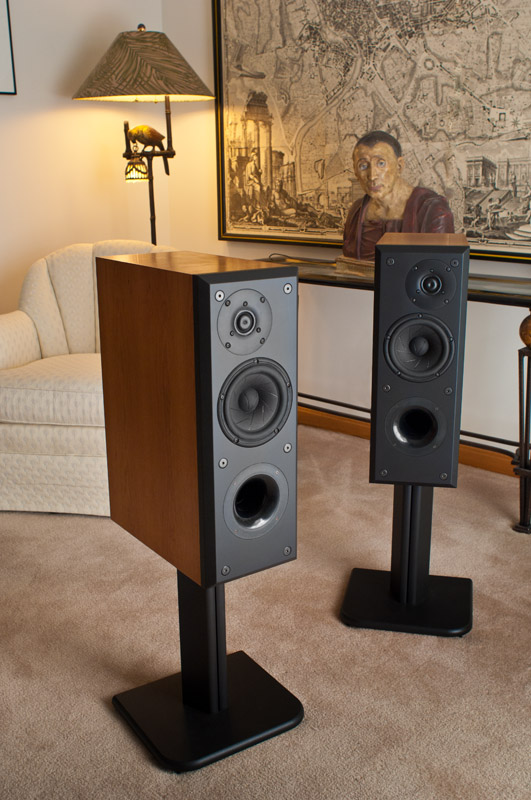
Here they are shown on some cheap stands. Cheap stands or not, they sound very, very good. I am very impressed with the Scan-Speak Revelators. They have a good reputation among DIYers, and now I know why. It's too bad that they cost so much money though.
Bill Schneider
2010
